Watercolour painting tutorial
Watercolor tutorial - how to paint a landscape, horses in paddock
|
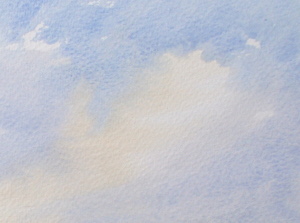
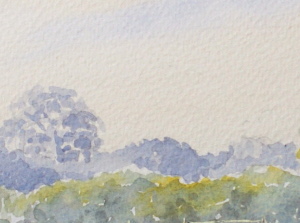
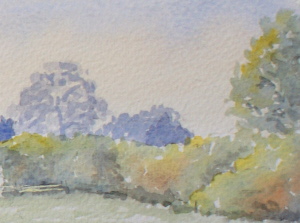
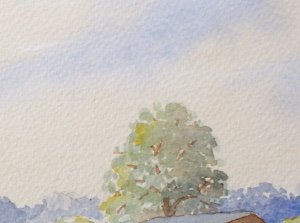
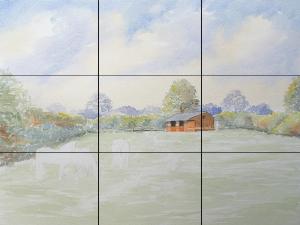
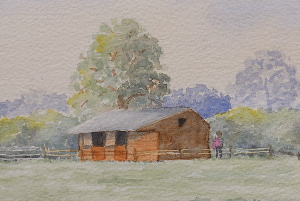
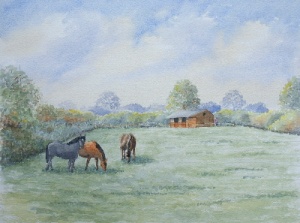
In this watercolour painting tutorial I will give you some hints and tips based on a watercolour commission. The task set was to paint three horses in a paddock based upon a series of photographs that were supplied by the client. The images have not been included here. Needless to say that in the background of the paddock were some ugly buildings and the odd telegraph pole. These were to be the first things to be omitted from the painting! The first thing to do was to sketch the scene using the classic rule of thirds. This is because any painting that has the subject slap-bang in the middle is, in general, not very eye-pleasing. In this case, the stable was set to one side, measuring approximately a third of the painting's width from the right hand side. The group of horses was set roughly to one third from the left hand side. With any painting I generally start with the sky. In this case I used a wet-in-wet technique but before committing paint to paper I mixed enough watercolours so that I would not run out of paint with only half of the sky covered! For the sky I mixed three watercolour washes. The first was pure Ultramarine, for the blue part of the sky; the second wash was of Ultramarine with a touch of Cadmiun Red, to be used for the shadows in the clouds; and finally a wash of Raw Sienna with a touch of Cadmium Red, for the lower part of the sky and the sunlit areas of cloud. I wet the sky area down to the base of the hedgerows with clean water and waited a minute or two so that it was not too wet. Turning the paper upside down, I applied the Raw Sienna wash to the lower part of the sky and to the sunlit sides of the clouds. While this was still wet, I applied the Ultramarine and Cadmium Red wash to the shadowed cloud areas. Finally, after turning the painting the right way up, I applied the pure Ultramarine wash to the top of the sky and drew the wash down toward the clouds. In the main I aimed for soft edges to the clouds but allowed some hard edges here and there for effect. Once completely dry, I added the distant trees using the Ultramarine and Cadmiun Red wash. The inital wash was weakened with clean water. When this was completely dry, a darker wash was layered on top, thus producing depth to the distant trees. The same watercolour washes were used for the treeline and distant hedgerows, ensuring that the shadows were placed in relation to the position of the sun. There are a couple of things that are not readily obvious from the image on the right. I added an initial wash of Ultramarine and Cadmium Yellow for the grass of the paddock and, used the side of the brush so that the result would have some texture, I applied the wash over the base of the hedgerow. For the hedgerow and the foreground tree, I added more Ultramarine to the green wash and prepared a seperate wash of Burnt Sienna. Before comitting paint to paper, masking fluid was used to define the fence at the end of the paddock. I intended that the fence would be highlighted in the sunshine, therefore dark tones at the base of the far hedgerow would be required. The next step was to paint the foreground tree and the hedgerows. I laid the Ultramarine and Cadmium yellow wash here and there and while this was still wet I added the Burnt Sienna. For the sunlit areas, I added Cadmium Yellow and left a few speckles of white paper. For the foreground tree, the same technique was used remembering to leave 'air holes' in the form of the tree. When completely dry, the trunk and a few braches were added using the Burnt Sienna and a touch of Paynes Grey. I should have mentioned composition at the start but I had painted the sky, background and stable before I took the photograph. Doh! Nevertheless, notice that I have used the rule of thirds to place the main features of the painting. The stable is placed one third in from the right and the horses (on outline right now) are grouped around a position one third in from the left and one third up from the bottom. Doing this results in a much more eye-pleasing painting rather than having the feature plonked right in the middle. For the stable, I wanted to create contrast from the surrounding hedgerows and a wash of Raw Sienna was ideal for this. For the roof and shadows on the stable I used Paynes Grey. See how the masking fluid is protecting the fence. I must admit that the hardest aspect in this painting for me was the horses. Perhaps that is why I left them to the end. What you don't see below are the many horses painted on spare watercolour paper in order to get the ones below to look right. Particularly as they needed to be specific horses. It is worth spending as long as it takes to create the right effect. With watercolours, unlike oils or acrylics, you get only one chance of to get it right. If not, you need to start over. When satisfied with the horses, it was time to build up the shadows and darker areas in the hedgerows and to add more texture to the grass.
Someone once said that 'art is never finshed, only abandoned'. You should know when you are coming close to this. It is worth looking critically at your work from a distance to see if it looks right. In my experience the final touches will be to make shadows and other areas darker. It is also worth asking a couple of other folk for their opinion and, if it looks OK to them, stop watercolour painting!. |
|
 | |
| |
 | |
 | |
 | |
|
Watercolour Paintings Landscapes Minimal Landscapes Wildlife Nudes Beaches and Boats Abstract Commissions Watercolour Gallery
Latest Work
Cockington Collection Lanercost CollectionWatercolor Tutorials
Equipment Colour and Tone Watercolour Washes Wash Techniques Perspective How to Paint Trees Watercolor Tutorial 1 Watercolor Tutorial 2 Watercolor Tutorial 3 Watercolor Tutorial 4Guest Artists
James Baldwin Lucy Toft Hamish CormackCOPYRIGHT All images shown on this website are protected by copyright. No artwork may be reproduced without prior consent by the artists.
Art Links
If you have an art related website and would like to exchange links, please click here.
Art and Design
Web design by zero78


Thank you for reading about watercolour equipment. Please now proceed to the next part of this watercolor painting tutorial.